The maintenance schedule in the owners manual indicates the “strainer” should be cleaned at 12000 mile intervals at the same time the fuel filter is replaced. This is for both the “A” and “B” maintenance schedules.
In the instructions in the service manual for replacing the fuel filter it states “Whenever the fuel filter is being replaced, the pre-filter in the fuel heater assembly should be removed and cleaned”. In the instructions for cleaning the pre-filter the cleaning of a “screen” is mentioned. So it seems that this “screen” in the service manual is one and the same as the “strainer” in the maintenance schedule.
Debris in the screen can restrict fuel flow and result in low engine power.
Individual gaskets and parts for the prefilter assembly are not available, but a pre-filter repair kit is available from:
Dodge dealers for $42 Part number 04762962.
Cummins/Fleetguard for $6 Part number 3845400-s.

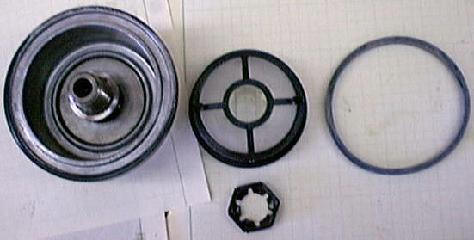
It consists of a strainer screen, gasket for the sediment bulb and a small pressed steel nut.
The parts guy did not know what I was talking about, took quite a while and a lot of polite diplomatic discussion before he let me look at the diagrams and point it out to him ( take a Xerox copy of that page of the service manual!)
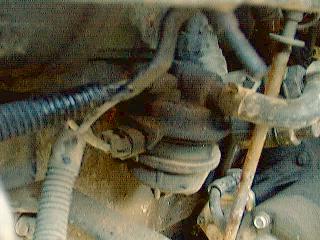
Before I started working on it, I sprayed the whole area around it with using the Spray Can version of GUNK engine cleaner, and then stuck a hose nozzle in there and blasted it clean.
Before de-gunking ->
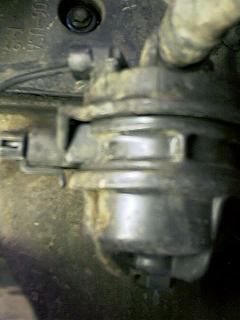
Much better after de-gunking.
Only two wrenches are needed to do this job – 17mm, 24mm
The first is a 17mm open/box wrench with a 12pt box end. The 17mm box end of this will be used to remove the screen/sump assembly. Much better if one stands up beside the truck and works from the top. I thought it might drip and Nedra doesn’t like oily stuff on the driveway so I put my oil change pan – a huge diameter 4 gallon one under the pre screener location. Highly recommended because a few ounces of fuel will drain out when the strainer sump is removed.
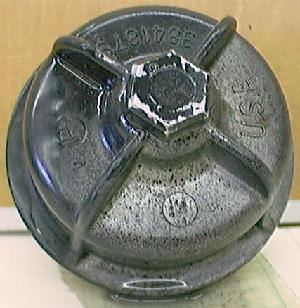
If you loosen it from below, be ready for fuel in the face – it “will” drip all over you and if you spill it you will be doused with half a cup of Diesel fuel. Some people report that a long extension with a u-joint allows you to stay out of the fuel flow when the nut is loosened. Others can reach the nut from above.
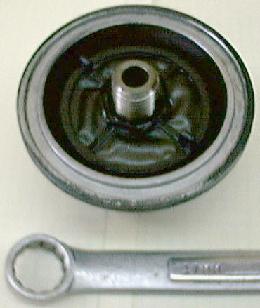
The second is a 24mm box wrench or socket to remove the pressed sheet metal nut that holds the strainer in place (inside the sump). It isn’t much more than finger tight, but if you aren’t bionic and need a wrench – 24mm is the size. Once I got it off I cleaned it up with a rag. It was not particularly dirty.
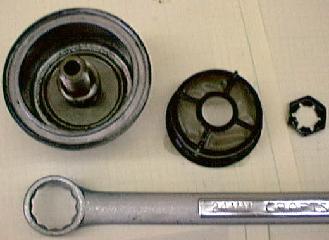
The gasket had started to crumble around one corner of the outer edge. It probably could have been reused but since I had a new part, I installed it. I also installed the new strainer – they come together in a kit with strainer, gasket, and nut. I saved the old ones in a self sealing plastic sandwich bag.
When I replaced the thing I pre filled it with clean fuel to minimize the number of strokes that would be required on the hand priming pump. The pre filling also allowed me to lubricate the new gasket with some diesel fuel before installing it. I stood on a little rubbermaid stool to give me better access and was able to get it into position and the threads started with out spilling more than a couple of drops. I ran it up finger tight and then using the 17mm box end I tightened it snug but did not get into a contest of wills with it – it was not all that tight when I took it off and it is a rubber gasket – so I used that as a gage for how tight to make it when I put it back. I gave the priming pump about a dozen strokes and then started the engine. It ran smooth with out any roughness as if air bubbles were going through it. Pretty easy to do, all things considered. I probably won’t look into it again other than as part of trouble shooting should there be a problem until it gets to 200K. As the pictures I took show, my usual fuel dealer has clean fuel – there was not much in there.
Fitch In Southern California
Posted to the TDR Forum by Mikepvg: While the strainer assembly is removed, check the Fuel Heater Element quad O-ring gasket on top of the heater element for signs of deterioration. After you remove the pre-filter bowl, you have access to the allen screw that will allow the heater element to be removed. NOTE: This screw appears in the service manual diagrams, but no mention of it is made in the instructions. All can be accessed from top of engine compartment. The pre-filter screen kit has the quad ring for the BOTTOM of the heater element & is a different size than the top one. One member posted that replacing replaced BOTH quad rings reduced the amt of blue smoke on start up & WOT substantially. The PN is Fleetguard 3834185-S & cost only .66 cents from Cummins!
[thanks to dodgeram.org used with permission]
One Comment