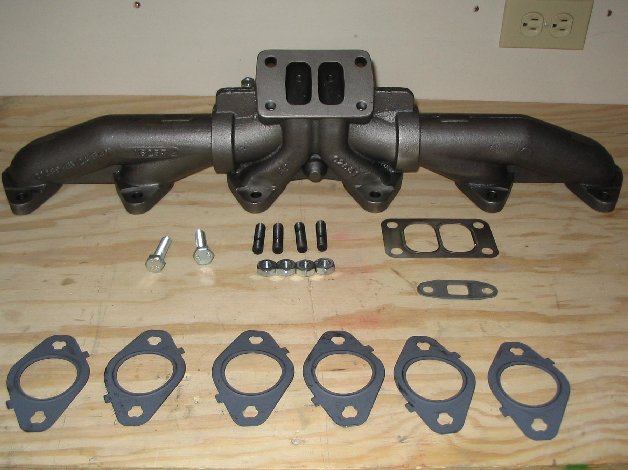
After much reading of folks having troubles with the OEM manifold cracking and the bolts coming loose from expansion and contraction I decided it was time for me to go to a 3 piece manifold, I opted for the unit from High Tech Turbo and purchased one from my friend Lazer Bob in Colorado, The manifold arrived and I was like a kid at Christmas time. Out to the garage with a full weekend ahead to play. Here is a pic of the manifold and installation kit
OK first thing first we need to prep the almighty Cummins by removing the turbo and manifold.
Step one – Remove the air filter housing and the inlet hose, tape off the charger inlet with duct tape so no dirt or dust can get in there.
Step two – Remove the clamp from the charger discharge to the intercooler, 11mm deep socket needed, then tape off both flanges (cleanliness is mandatory boys)
Step three – Remove the oil feed line to the turbo, 20mm wrench; yep tape off both the swivel nut and the inlet into the turbo.
Step four – Remove the two bolts from the oil drain tube, you will need a 10 mm socket with extension on the inside bolt and a 10mm wrench on the outside bolt.
Step five – Remove the five 13mm bolts from the exhaust elbo and save the gasket as you will need it. This step may differ pending your turbo setup.
Step six – Remove the two 15mm nuts from the underside of the turbo flange where it bolts up to the manifold this will be a true test of your dexterity. Now remove the two 15mm bolts and carefully remove the turbo. Tape off all open flanges of the turbo at this point .
Step seven – Remove the exhaust housing using a 13mm socket and extension, Save the 12 bolts and spacers as you will need them. Clean up the machined surface of the Cummins and make sure all carbon deposits are gone.
Take a good look at the old manifold and check for cracks so you can understand the heat issues you are dealing with here, If you have access to a bead blaster you may be surprised what you find as the cracks will be very apparent, this manifold may become a trophy of sorts so you can brag to your buddies about that time when you hit 1500° on the dyno hehehehe. If it is cracked show the wife as this will help to justify a different turbo arrangement in the near future, that’s right boys use the system it works hehehehe.
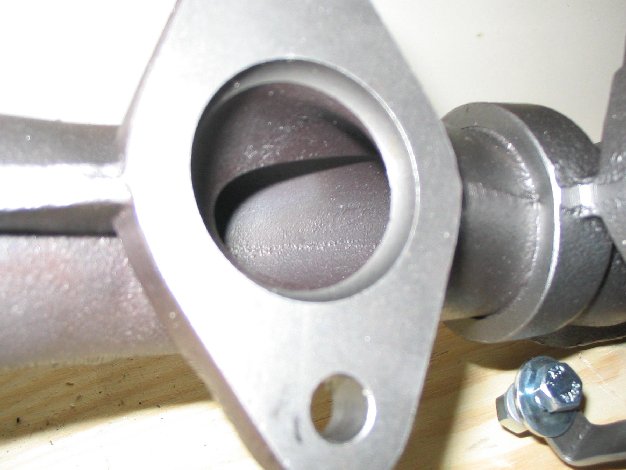
Now that we are this far its time to address some porting issues. Let’s concentrate on the six exhaust ports of the HTT manifold. There are some milling tracks that we need to feather in here, Remember the manifold is .300 so don’t get to carried away and by no means do you want to alter the flange face as it is a perfect machined surface . . . be careful and go slow. Here is a pic of the port untouched as it was received.
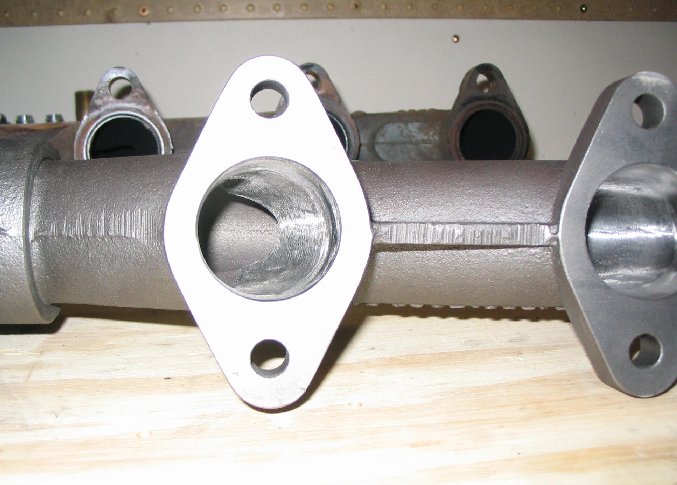
Here is a pic after I carefully removed some metal and feathered into the exhaust tube, I still need to put a smooth finish on it but this will be done when all 6 ports are how I want them.
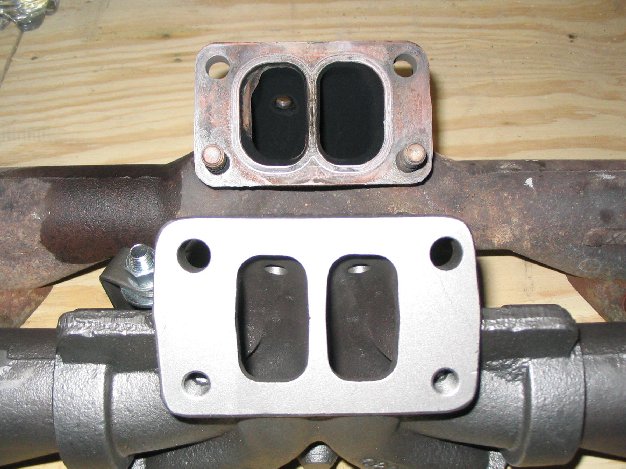
OK now we need to polish the 6 ports up as smooth as we can, remember looks doesn’t matter too much so go by the feel, if it feels nice and smooth then you are there, What you have now done is to make a less restrictive and free flowing manifold that will help to get rid of those high EGT’s
Let’s now take a look at the exit of the manifold where it mates to the inlet of the turbo. Here is a pic of the ports untouched compared to the OEM manifold.
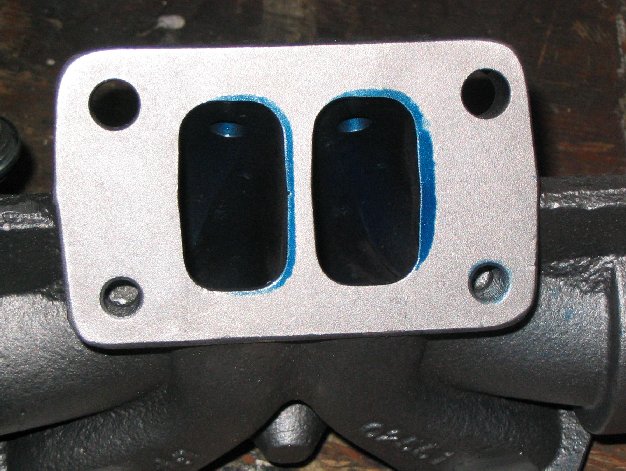
First off we need to make a footprint of the turbo flange face, I used a thin piece of gasket material and a small ball peen hammer to tap one out. Now mark the template side with turbo side, exhaust housing side and top so it won’t get confused later. Take the template and the thin metal gasket and place it exactly on the flange face of the manifold, remember to side marked manifold side? Now with it in place use some bluing spray or some dark spray paint and lightly paint the metal showing on the face so you know what to take off. It will look something like this.
This is tricky so look it over good, what you want to do here is not to open up the ports big time but rather to feather them in, keep in mind the manifold is only .300 and you don’t want to get to aggressive here. I start with like a 30 degree angle and remove all that in painted, this will only feather the opening into the throat about 3/8 to 1/2 inch, then when you get that far you can lessen the degree and feather it in like an inch or so. After you get it like you want it polish it up real good and remember to go by feel . . . if it feels good than it is good! The manifold is ready for a complete blow down of filings and dust.
Installing the HTT exhaust manifold
Note: all mounting hardware to have a coating of anti seize before installation. Re-torque all bolts after a week or so.
Install the six new gaskets ant ten of the original mounting bolts (13mm) with spacers, cylinder 3 and 4 top original mounting bolts will be replace with the 2 new 15mm bolts supplied in the mounting kit. I put the gaskets and bolts on the manifold first as the steel gaskets have retainers in them to hold the bolts from sliding out. Hold the manifold up to its new home and work one bolt on each end in, this will hold it in place while you screw the others in place. The #3 port top bolt will need the waterline bracket as well. Tighten to snug only with a ratchet then move in with your torque wrench set at 25 lbs, start in the middle and work your way to the outside, now set the torque wrench at 35 lbs and repeat, remember boys a smooth torque wrench is more accurate, Where is that little smilie where the guy is hitting himself in the head with the hammer?
Take a good look at the oil return line, if the gasket is still there remove it and clean up the surface. Install the turbo by bolting up the flange from manifold to turbo. . .don’t forget to use the new gasket supplied with the kit. Install oil feed line, exhaust outlet , charger outlet and finally the exhaust outlet, Now take a look around to see that you have NO filtration, yep go ahead and install that too while you are in there, don’t forget to take the tape off all this stuff before you go back together eh GEZZZZZZZZZZZZZEEEEEEEEE.
If you run a temp probe (and please tell me you do) use the pre tapped port lined up with exhaust ports 4, 5 and 6 as they run the hottest.
Hang on and have fun.

