
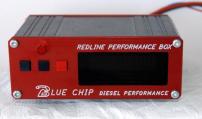
Installation Directions for the Blue Chip Wizard Fuel Management System
For the 1998-2002 Dodge
For this installation you will need: a ratchet with extension, a 10mm socket, (17 and 19 mm wrenches for 2000 and up trucks only),a 13 mm wrench or socket, an 11mm or 7/16 deep socket or wrench, an electric drill with either a 29/64″ or 7/16″ bit, a 1/4″ pipe tap, a number 2 phillips screwdriver, a small, 1/8″ or so, flat bladed screwdriver, a 5/8″ open end wrench, a pair of water pump pliers, a test light, a pair of straight pliers and a single edged razor blade. If you purchased the plastic injection pump cover, you will need a 5/16″ open end wrench and either a “25 TORX” bit or a “25 TORX PLUS TAMPERPROOF” bit to remove the pump cover and install the replacement cover. The date that they went to “TORX PLUS TAMPERPROOF” was approximately the change to 2001 model year, but replacement pumps often have the tamperproof screws, so it is best to look at your pump first to determine what you’ll need. The “25 TORX” is a six point solid bit and the “25 TORX PLUS TAMPERPROOF” bit is hollow and has five points. If you need any of these special tools for the replacement cover, we will sell them to you for a reasonable price.
Drill and tap a 1/4″ pipe thread hole in the turbo outlet elbow and install the thermocouple assembly. The hole should be drilled with a 29/64″ drill bit, but a 7/16″ will do. Run the tap almost all the way into the hole to get the best position for the thermocouple. The two leads of the thermocouple extension cord should be inserted into the little green plastic plug on the back of the box and retained by tightening the screws on the bottom of the green plug. You may have to cut the spade terminals off the red/yellow wires and strip off a little insulation to attach the wires to the connector. The yellow or white wire from the thermocouple should be attached to the terminal closest to the outside of the box. The green plastic plug can be removed by just pulling on it straight away from the box. Never solder other wires to a thermocouple or it won’t work correctly. If you already have a pyrometer and want to use the thermocouple from that installation, or add the FMS to that gauge so both gauges work, you may do so by just extending the thermocouple wires by twisting or crimping normal stranded wires to the red and yellow or white and black wires at the back of the existing gauge. If the wires are backwards in the green plug the FMS will not display exhaust temperatures,but no damage will result.
We are suggesting a new approach to the electrical installation of the Wizard Fuel Management System, to make installation easier and less time consuming. We are suggesting you run the wires that go to the engine compartment out the driver’s door from the left side of the dash. Our Beta testing has found this approach very durable and well received by the installer; of course you may run the wires through the firewall if you wish. The telephone type cable, the blue fuel pressure wire and the red/black siamese wire should be fed over the weather strip on the driver’s door, inside the hood hinge, under the plastic cowl cover to the appropriate connection points. You will find tucking them under the plastic cowl cover protects the wires from interfering with the hinge. The thermocouple wiring coming from the engine compartment should be fed back to the gauge the same way, over the door weather strip.
19 November 2002
On 98 and 99 trucks remove the fuel pressure test plug on top of the fuel filter housing to install the low fuel pressure sending unit. If you want to read fuel pressure going into the filter, install sender in the outside plug hole and if you want to read pressure after the fuel filter, install the sender in the plug hole closest to the center of the filter housing. On 2000 and up trucks, remove banjo bolt with the test port on the inlet fuel line, going to the injection pump. When removing the banjo bolt, push on the line toward the pump until you have removed the bolt and then release the line while catching the rubber washer behind the line. The less time you allow air to get into the fuel system the better the truck will start after installation. Should the truck not start you will have to crack 2 or 3 injection lines at the valve cover and crank the engine until fuel comes out or the truck tries to start. Then tighten the lines and the truck should start and run smoothly after a few seconds. The blue wire should be routed out the driver’s door and attached to the sending unit.
The phone style harness is connected to the Boost/MAP sensor, which can be found behind the fuel filter toward the back of the engine. Unplug the factory harness by lifting the retaining tab and pulling connector straight away from engine, and plug our harness into the sensor and the other end of our harness back into the truck harness. Be sure to do this with the ignition key in the off position. Run the phone style wire and connector into dash area. The 2001 and 2002 MAP harness plug is three wires in a straight row and the 98-2000 uses a triangular pattern in the plug. Just match the plug and socket to the harness and you’ll be sure to be on the right sensor.
Remove the throttle linkage housing by removing the three bolts that are 13mm. If you feel you need more working room, remove the intake tube, using the 10 mm socket on the bolts going into the intake manifold and the 11mm or 7/16 socket or wrench on the clamp on the top of the hose, remove the intake tube. Move throttle housing out of the way by pushing it down toward the fender, by the intercooler pipe, for easier access to the pump wires. Try not to pull too hard on the wires, or disconnect the throttle position sensor wires by removing the plug under the throttle housing. If the truck only idles when started you know you have disconnected the sensor!
IF YOU DID NOT BUY THE PLASTIC INJECTION PUMP COVER, the short red/black (siamese or zip cord style) wire harness should be connected to the injection pump. Please use the enclosed Scotchloks as they have dielectric compound in them to make the connection much more weatherproof. The red wire should be Scotchloked to the upper inner black wire (the one closest to the engine block) that comes out from under the cover on the top of the injection pump. The upper pair of wires is a larger gauge than the bottom pair. Slide back the covering and connect the red wire. This is where we suggest a pair of water pump pliers, as they can get the right angle on the Scotchlok. You want the pliers to be square on top of the metal portion of the Scotchlok to get the metal piece to slide into the Scotchlok straight and pierce both wires. If the metal part bends to one side you will have a bad connection sooner or later. Be sure to use this red/black harness as it has a ferrite core in it and is crucial to the smooth running of the truck. To check your connection turn the ignition key to on and verify voltage at the red wire.
Remove the main wiring harness from the injection pump by pulling the indented part of the plug towards the fender with your left hand, while wiggling the main part of the plug and pulling it toward the firewall at the same time, with your right hand. Use a razor blade to remove the black tape holding the outer plastic covering from the wires and locate the black wire with a brown tracer and attach the black wire from our short harness there with the supplied Skotchlok.
IF YOU DID PURCHASE THE PLASTIC INJECTION PUMP COVER, using the correct TORX bit remove the five screws holding the metal lid on the injection pump, and remove the metal cover. Be sure the rectangular o-ring is still on injection pump before installing new replacement cover. Check the replacement plastic cover to be sure the pointed allen screw is retracted and isn’t sticking out of the hole on the pump side of the cover, and install plastic cover on the injection pump. Be sure the cover is in its “happy place” and start all five screws. Tighten all five screws evenly. Keeping the lock nut loose, turn in the allen screw until a resistance is felt and then turn in 3 1/2 more turns. Attach ring terminal from red wire to allen screw and gently tighten locknut. To be sure of the connection, turn the ignition key to the “on” position and verify that battery voltage on the red wire. Attach the black wire from our red/black harness to the black wire with a brown tracer as described above in the second paragraph of “If you did not buy the plastic injection pump cover”.
The box should be mounted on the left side of the dash with the included Velcro strips. This location, we feel, is the safest and most desirable, as the driver doesn’t lose sight of the road when reading all the information available from the FMS. We feel under dash mounting is unsafe.
The short red wire connects to fuse number 9 in the fusebox on the left side of the dash. Remove the fuse and slide the brass fuse tap connector over one leg of the fuse and reinstall with tap on top leg of fuse; attach the flag terminal from the red wire to the tap on the fuse, so box is fuse protected. DO NOT CONNECT THIS RED WIRE ANYWHERE ELSE. Connect the short brown wire to fuse number 5 the same way.
Turn the key to “on” and the display will explain what it is self-testing during power-up. If it sees a problem it will tell you where to look!!
If you ever consistently see the “F2 error” displayed, replace the 3-amp fuse on the back of the box. Do not use a larger sized fuse or the box may suffer serious damage. As a point of information, if the fuse is blown or not in the FMS box, fuel enhancement only, is eliminated. The FMS hides the “overboost” code from being set in the ECM computer, so the dealer can’t prove you had a fuel-enhancing device even with their diagnostic tool.
If you do not remove all the wiring and box before going to the dealer they will surely void your warranty when the service department sees any modification to the truck. If you purchased the plastic injection pump cover, you can easily remove it, and reinstall the factory metal lid before returning the vehicle to the dealer for warranty consideration. The dealers are advised by Chrysler to look for nicks in the solenoid wire of the injection pump to void your warranty. We do not endorse lying to the dealer to obtain warranty service. That is your moral issue.
Please use our toll free number, 888-ISB-PERF or 888-472-7373 for technical assistance, or to report anything you like or dislike about this product. We value your input and suggestions.
