
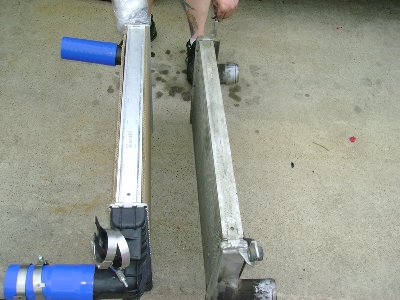
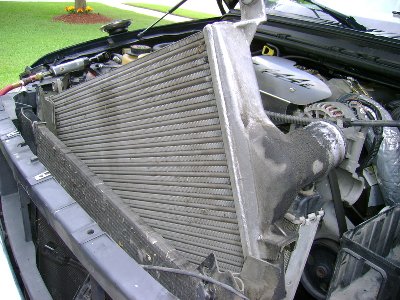
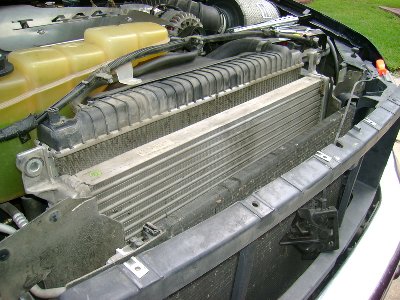
The swap is relatively inexpensive and not to time consuming. Used 6.0 intercoolers can be had on eBay for around $100-$125. The 6.0 IC is about 30% larger than the 7.3. The original 7.3 PSD intercooler measures 30x18x2 and the 6.0 PSD is 30x21x2.25.
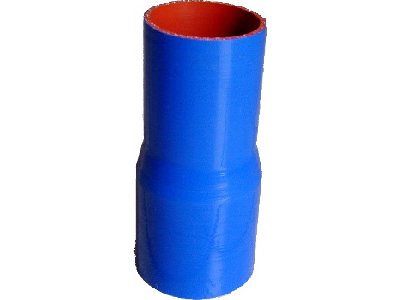
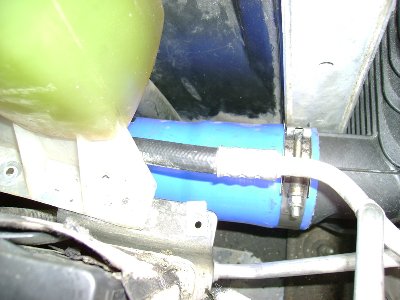
One thing you should be aware of before you stat taking stuff apart is the 6.0 IC inlet and outlets are not both the same diameter as the 7.3s and the tube lengths are just a bit different as well. The easiest way to correct this is to purchase a transition hose, 3×3.25×8 and another 3x3x8. It is my understanding that some later ’05-’06 ICs have a diameter of 3.5 on the hot side, so you may want to measure your IC before you order your hoses. You don’t actually need 8 inches of hose, but it will allow you to make the gap in distance with no problems at all, additional it gives you plenty of room for flex, and insures a great seal.
Here is a link to a vendor for the connecting hoses. At the time of this article, none of the powerstroke.org vendors carried these parts. As always we strongly encourage our members to support our site vendors. http://www.dieselpowerproducts.com/air
You will likely need an extra person for some parts of the job; although not mandatory, there are a few steps in which an extra set of hands comes in handy.
You will need:
Door panel tool (optional)
An extra person (optional)
Metric deep sockets
Long extension
Open end/box in metric wrenches
Non-petroleum based degreaser, Simple Green etc.
REMOVAL:
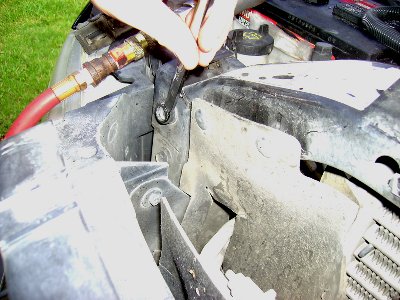
Start by removing black plastic panel that is in between the grille and the radiator. It is held in by plastic push rivets. A door panel tool is helpful here but not necessary.
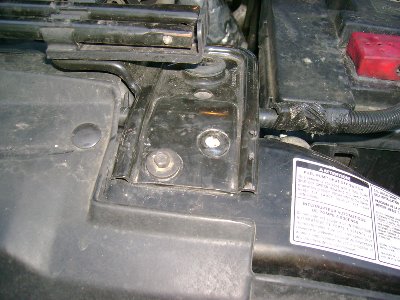
Next, remove the bracket that holds the lug wrench and jack accessories. Then remove the (4) 8mm bolts that hold the upper radiator support brackets in place.
The positive battery cable that runs to the driver side is held in by some small tabs. Disconnect the cable from the driver side battery and gently pry up the tabs, then tie it out of the way as it will still be hot.
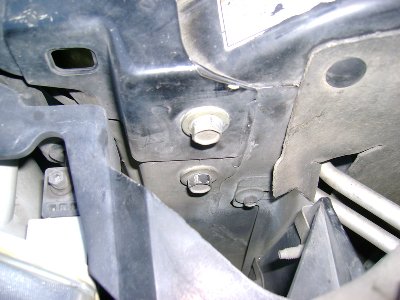
Remove the 2 bolts that hold the coolant reservoir in place. It is not necessary that you drain or remove the reservoir completely.
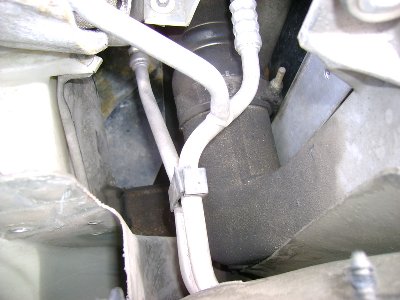
Remove the 2 bolts that hold down the A/C lines on the driver side. Obviously, DO NOT disconnect the A/C lines. You also need to remove the brackets that hold the condenser in place located on the front of the cross member. You will also need to remove the hood latch mechanism.
Now remove the 2 bolts that hold the upper portion of the IC onto the cross member. Take them all the way out.
Next step: remove the cross member. It is held in by (4) 13mm bolts on either side. You may need to use a little extra effort in removing the cross member. Tap down on one side, then lift on the other. This is where you may need an extra person.
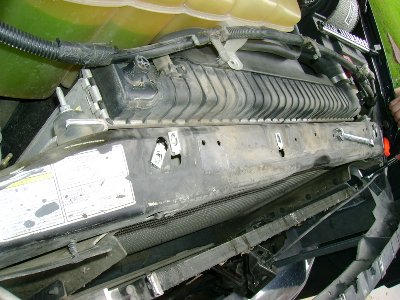
The radiator will push back a bit as well. You should have plenty enough room to remove the IC.
Loosen up the hose clamps on both sides of the intercooler and slide them back. Now the IC should be free.
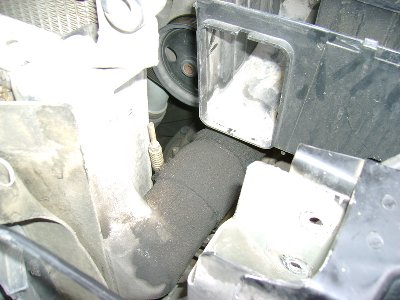
You may find it easier to reach the driver side clamps by removing the factory air intake piece. On the driver side you will need to wiggle around the A/C lines that you loosened earlier to make room. Zoodad anyone?
The intercooler will come out much like the cross member did, first lift up on the drivers side, and then you can more easily navigate around the BS on the passengers side. An extra person here is a bonus as well.
INSTALLATION
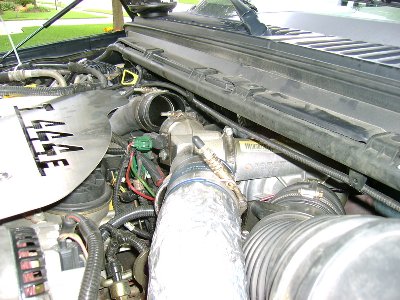
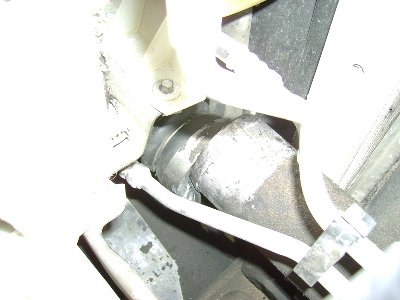
Before you drop the new IC into place, you should take the IC hard pipes loose from the top of the intake. You may not need to do this, but it does make things a bit easier when hooking up the new hoses.
The foil on the intercooler end of the driver side hard pipe will need to be trimmed back about 4 inches. At this point the easiest way to do it is just take the pipe all the way out. After the foil is removed replace the pipe in original location. (If you’ve ever wanted to do the foil delete mod, this is a golden opportunity).
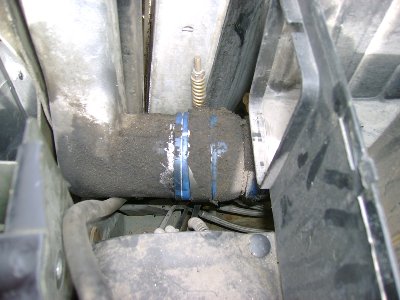
Get yourself a non-petroleum based degreaser, such as Simple Green, to clean the oil and dirt from the ends of the IC hard pipe. As you can see in our example, they were caked up with oil residue and dirt.

Take a few minutes to get the extra oil residue wiped out of the hard pipe where you can. The oil is a normal thing, so if you see some here and there, don’t worry.
It is easiest to place the connector hoses on the hard pipe FIRST. With the ends of the hard pipe loose from the top of the motor, this will allow you wiggle room and make the connections to the IC much easier. If you have trouble sliding the hoses on, a light soap and water solution will make it easier. Slide the two clamps on each of the pipes but don’t tighten them just yet. Don’t forget your transition hose goes on the passenger side. The hot and cold sides are reversed on the 6.0.
You should have plenty of room to set the new IC in its new home. If you have help, take care to place the intercooler in the new spot, and check for any clearance issues. The passenger side lower portion of the cooler may butt up against the tranny cooler, but once you get the cross member back in place and re-hang the IC, you should be in the clear. Nevertheless do pay close attention to this just to be safe. Worst case scenario: You may have to bend the tranny cooler out of the way a bit, but it won’t take much.
Once you feel comfortable with the placement, you can connect the hoses from the hard pipe. It helps to have two people here, one to place the hose and the other to work it into place from the side of the truck by wiggling around the hard pipe.
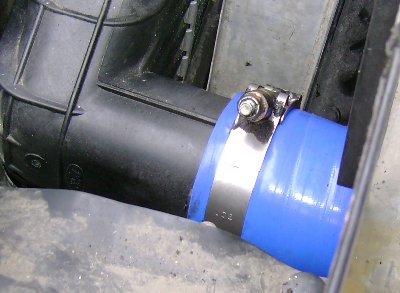
Once your hoses are on, you can tighten your clamps up. They should be snug but don’t over do it; you may distort the hard pipe or worse crack the inlet/outlet on the IC. They do have a metal sleeve inside but they are plastic otherwise. You should make sure the hoses are as far up against the IC elbows as they can go. The inlet/outlet has some small ridges on them, just push the hoses up to the ridge evenly, and tighten everything up.
Now the rest: Not much to it, just put everything back where you got it . . . double check your hoses to make sure your clamps are on tight, and look to see if anything is in the way, etc. Make a quick common sense look.
It easiest to start with the cross member; set it in place but don’t bolt it in just yet. First, loosely attach the intercooler with the two bolts that hold it to the cross member. Tighten them down but not quite all the way. Now you can attach your cross member and snug it into place. Then go back and finish tightening the IC bolts. Its easier doing this way than installing the cross member first and trying to wrestle the IC up into place.
Reattach the upper portions of the hard pipe to the plenum. Next, put the A/C condenser brackets back on and tighten them up. Then install the coolant reservoir bracket into place, the bracket for the A/C lines and snap the little air intake piece back into it’s place. Bolt up the hood latch mechanism. Reconnect the driver side positive post, and tap the tabs back into place. Replace the black plastic cover, and the jack components. Done.
Last Checks
Drive around and make sure everything is as it should be. If you took time and checked that everything had proper clearance, the only real problem you may encounter is a loose clamp resulting in a boost leak.
The Payoff
The single biggest benefit to the swap is lower EGTs. In our example, peak EGTs were down 75-100 degrees. The truck seems to make just a bit more power; no doubt from the cooler air charge from the larger IC.
