
Breathing is one of the basic elements of life. That’s the way God made our bodies and it is embodied in the DNA of the diesel engine. It is ironic that when diesel enthusiasts talk about mods, the first element that comes up is most always the chip. No chip, however, can develop its full capacity if the breathing is restricted in any way. So, when talking mods, the first three elements should always be intercooler, intake and exhaust — or breathing.
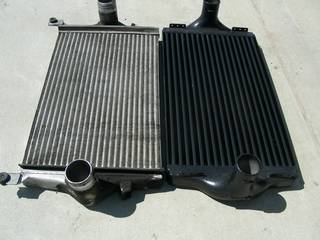 When I first started tearing into this project, I noticed the Banks Technicooler was not much larger than the factory unit it was replacing. Both units are approximately thirty inches wide, eighteen inches tall and two inches deep. The factory unit has less depth but it does have a few more rows in the condensor. At first, I was upset and thought that if I went through with this project it would be a waste of the next six hours. I was getting ready to stuff the new unit back in the box and list it on eBay when I decided to take a closer look. Both inlets and outlets are nominally three inches but here is where the similarities end. The intake and exhaust manifolds of the Technicooler are much larger and they are rounded in shape. The factory unit has narrower manifolds and a pronounced squared passage. The tubes supplied with the Banks Technicooler have more radiused curves and less restriction to air flow. After reviewing the differences in the air movement, I thought it possible the next six hours might be a good investment for my truck.
This install, by the way, is in a 2000 F350 PSD. This instruction will apply pretty much the same across all models. Speaking of instructions, Banks sends out the complete “Power Pack System” instructions with the Technicooler unit. For this install, you can skip the first nine pages and begin with instruction number thirty on page ten. We will continue through instruction number sixty on page thirteen. The exploded illustration on pages eight and nine will be quite useful.
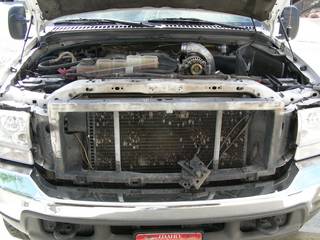 The project has begun. So far, I have disconnected the negative battery terminals from both batteries and removed the grille. I skipped instruction thirty-two because I could see no sense in disconnecting the lighting to complete this project — I was right. This project was completed successfully without this step. Also skipped the steps involving removing the air conditioning condensor and the power steering cooler (34b, 36b through 38). I know very little about AC and didn’t want to mess up the system. This project was completed successfully leaving these items intact and the extra time to work around these items was not even noticeable.
Don’t skip instruction thirty-five though! I didn’t and I’m sure when you re-assemble, you will be glad you marked the location of the hood latch!
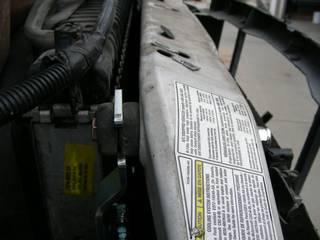
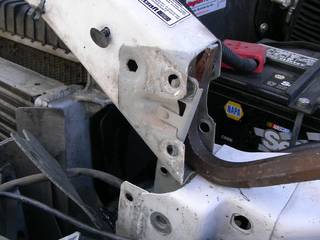 After unbolting at both ends, remove the upper arm of the radiator support assembly using a prybar — carefully.
Follow the instructions to complete the removal of the factory intercooler.
 Next, mount the bottom supports for the Technicooler. The mounting screws are just sheet metal screws, so you must be careful not to over-tighten them. Just make them firm but don’t cinch. You will notice the Banks intercooler does not support the same mounting system as the factory intercooler.
The new supports mount on the existing intercooler support just under the brackets referred to as the “ears.” Run them up tight to the joint. Double check this location by measuring nineteen inches from the top of the new bracket to the seam between the top of the radiator and the core (2000 F350). Regardless, both sides should measure the same against a similar reference point on each side of the vehicle and should allow approximately one-quarter inch clearance between the intercooler and the upper arm of the radiator support. You might want to dry fit the parts before you complete the installation of the lower mounting brackets. If you are like me, you won’t, you will measure instead — it works.
 Follow the instructions to complete the installation of the Technicooler.
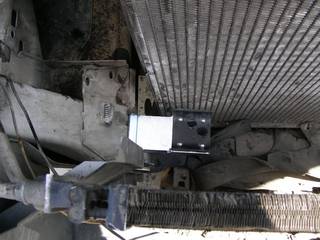
Because the bottom mounting brackets are held on by sheet metal screws, I thought it would be wise to beef up the upper supports. Here I modified the the upper support bolt by removing the factory set-up, drilling a half-inch hole all the way through the upper arm of the radiator support and mounting the intercooler using a 3/8 x 5 bolt. All I had on hand were grade eight, which is an overkill but it works.
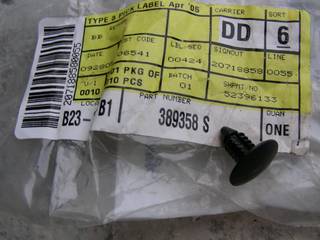 Before you start this project, you are going to want to buy a bag or two of these pushpins. They come in bags of ten and Ford thinks they are made of gold (approx seventy-five cents each). The part number is 389358-S. I always have a couple bags on hand because they are useful for so many things. Even use them to install pillar mounts.
Put it all together and go for a test drive. Wow! (could say that a couple times). Much faster response and five more pounds boost!
If you’ve got yourself to this point, celebrate! — and, go get yourself a chip!
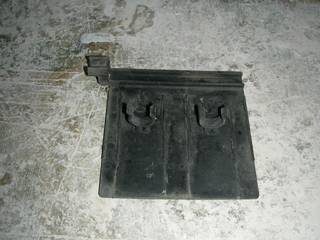 BTW: I’ve got a question: what’s this? — It fell out of somewhere!!!
