
This is a NEW USERS guide to gauge install preparation. I wish that I had something similar to this when I started this project. So I have assembled the information in this document with the goal of helping people to prepare for installing gauges.
Some of This information has been obtained from Turbo Diesel Registry (TDR) archives and threads in which I have participated while attempting to educate myself before getting my hands dirty.
IMO – anyone who can install an aftermarket radio can also do the gauge installation themselves. Just take your time.
LET’S GET STARTED!
BOOST GAUGE INFO
Boost gauges are available in many sizes. 0-35 psi is widely used but with where things are going in the CTD world you’ll be pegging it and not sure how much boost is actually being generated. I think a 0-50 psi is sufficient but will use a 0-60 psi gauge just in case.
Boost install kit comes with the boost gauge

Many drill and tap the air horn for hook up to motor. Piers Diesel Research, Inc. offers a BOOST BOLT.
All you do is remove a bolt from the top of the engine and put the BOOST BOLT in the same hole. The boost bolt is already tapped for the boost gauge hose.
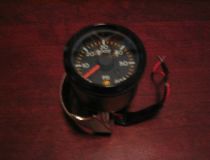
FUEL PRESSURE
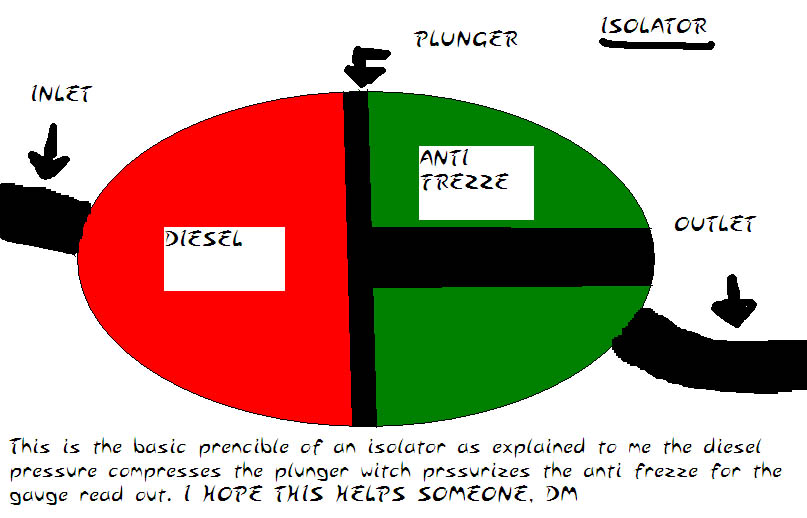
ISOLATOR
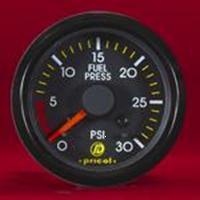
After the purchase of the gauge usually 0-30 PSI you have to purchase other parts to complete installation.
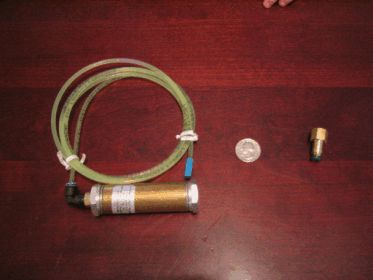
Enterprise Engine Performance (EEP) Isolator (www.enterpriseengine.com)
The EEP Isolator is pre-primed with antifreeze for the connection between the isolator and the gauge. The Isolator is mounted under the hood with the antifreeze filled line ran through the fire wall into the cab and to the gauge.
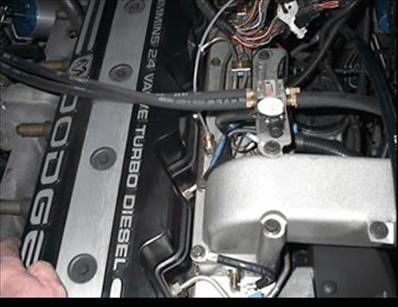
The connection from the isolator to the motor is highly debatable. On certain model years there are ports on top of the fuel filter for the connection.
For the years that don’t have the ported fuel filter cap, Geno’s Garage has an after market billet fuel filter cap that is tapped for the FP gauge hose hook up.

I chose to connect into the Schrader valve on my Vp44; it’s like a tire valve stem with the needle inside. This is also known as a test port.
Geno’s Garage has a special GG like hose that’ll push the needle in when you tighten the hose down so removal of the needle is not necessary. There are more options for taping the motor for FP Gauge hook up.
Many TDR members use a standard Grease gun hose for the connection but this requires the removal of the needle inside the test port.
PYRO
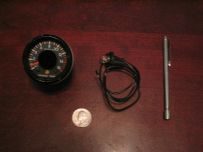
When you purchase the gauge you’ll get a thermocouple and thermocouple lead wire. Additional tools are required for install.
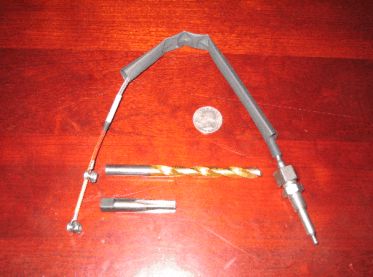
This is the Inconel type “K” Thermo couple.
The Drill bit is 11/32, the tap is a 1/8 N.P.T. (it is tapered, a normal tap won’t work)
The manifold is not hard metal, so drilling is easy. Installation of the Thermo Couple is also highly debated, some remove the turbo before drilling (only 4 bolts but may require replacement or manifold gasket).
Others (ME) just put a dab of grease on the drill bit to catch the shavings. A small magnet tool can also be used to get any small pieces out of the manifold.
NOTE: TURBO DAMAGE MAY RESULT IF METAL SHAVINGS ARE LEFT IN MANIFOLD!!
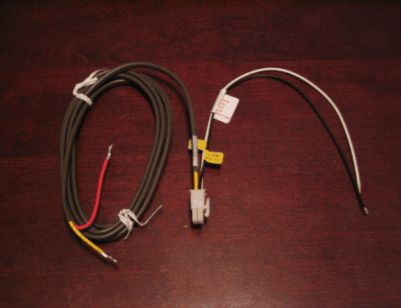
Here is the EGT Gauge Thermo Couple lead wire that connects to the gauge.
Complete Install Info
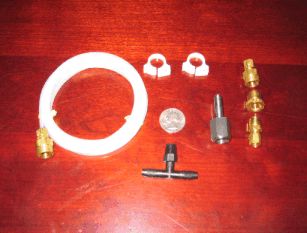
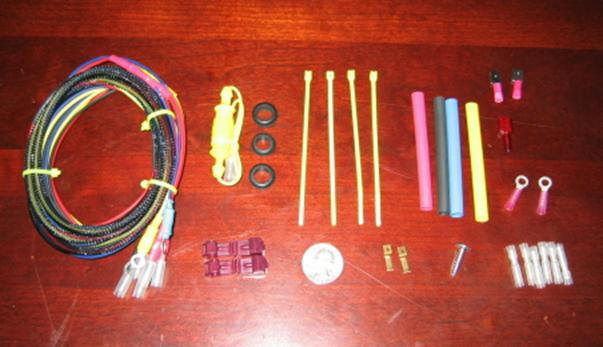
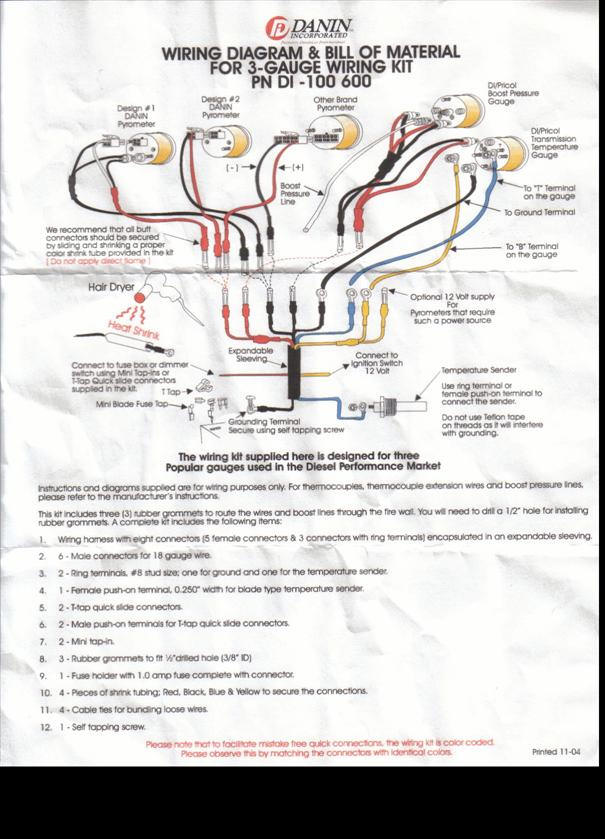
Here is an installation kit for gauge systems available at Geno’s and DPP
Other recommended tools
This is what most TDR members use for all piping connections
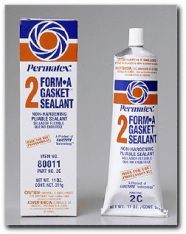
PERMATEX 2
Conclusion
I’m not an expert; I’ve just spent a lot of time learning how things are done. I also do not represent any particular company; I am just an ordinary TDR member who loves to help others. There is more to installing gauges, but this is basically the cliff notes that’ll give you a good idea how thing work and what is required for installation. You can do all this for less than $500. If you can find some gauges that come with every thing you could possibly need for install and buy every thing at once it’ll save you time and money.
[thanks to TDR used with permission]